


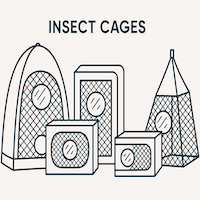
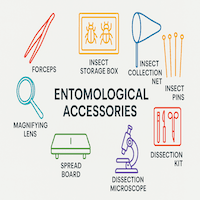


Selection Guide for Insect Rearing Cages
Choosing an insect rearing cage is not merely a procurement decision—it shapes how confidently you handle colonies, how cleanly you run assays, and how reproducible your results are. The right cage prevents escapes, minimizes handling stress, and simplifies feeding, cleaning, and observation. This guide walks you through the major choices—frame/backbone materials, mesh types and colors, access features, and size—and then shows how to translate those choices into a fast, reliable selection using our series logic (e.g., 4E, 4F, and the aluminum-profile "flek-AL" lines). You can click the dropdown menu to locate an insect cage based on your specific requirements.
Start With Your Organism and Experimental Goal
Before comparing materials, anchor your selection on two essentials:
Species & Size Considerations
The selection of mesh size and enclosure design should always be aligned with the body size, behavior, and escape ability of the target insect species. Very small or delicate insects—such as thrips (Thrips tabaci), aphids (Aphis gossypii), whiteflies (Bemisia tabaci), and sand flies (Phlebotomus spp.)—require fine mesh (typically ≤150–200 µm) to prevent escape and block contaminants. These insects can easily pass through standard mosquito mesh and are also sensitive to airflow, so finer mesh helps maintain controlled micro-environments.
In contrast, medium-sized insects such as mosquitoes (Anopheles, Aedes), Drosophila melanogaster, and many Lepidopteran larvae (e.g., Spodoptera, Helicoverpa) perform well with standard mesh (~300–500 µm), which balances ventilation and containment. This mesh allows sufficient airflow for respiration and odor delivery (important in olfactometer-linked studies) while preventing escape. For these species, excessive mesh fineness is unnecessary and may even reduce airflow efficiency.
For larger and more robust insects, such as beetles (e.g., Tenebrio molitor, Tribolium castaneum) and predatory insects like mantids (Tenodera spp.), cages can use coarser mesh or even perforated panels, provided structural strength is ensured. These insects are less likely to escape through mesh but may exert mechanical force; hence, sturdy frames (aluminum or steel) and reinforced mesh matter more than mesh fineness.
Behavioral traits must also be considered:
- Climbers (aphids, whiteflies) require smooth internal surfaces or inward lips to prevent escape.
- Strong fliers (moths, mosquitoes) benefit from mesh that minimizes wing damage.
- Burrowers or chewers (beetle larvae) require solid base materials rather than mesh flooring.
Overall, matching mesh size, airflow permeability, and structural strength to the biological and behavioral characteristics of the species is essential for maintaining containment, ensuring insect welfare, and achieving reliable experimental outcomes.
| Insect Size / Group | Typical Body Size | Example Species | Recommended Mesh Size | Why This Mesh? | Notes / Design Tips |
|---|---|---|---|---|---|
| 🟢 Very Tiny Insects | ≤ 1 mm | Thrips (Thrips tabaci), aphids (Aphis gossypii), whiteflies (Bemisia tabaci), sand flies (Phlebotomus) | ≤150–200 µm (Very Fine Mesh) | Prevents escape of extremely small insects | Use smooth inner surfaces; avoid gaps at joints |
| 🔵 Small Insects | 1–3 mm | Drosophila melanogaster, small parasitoids, fungus gnats | 200–300 µm (Fine Mesh) | Balances containment and airflow | Important for behavioral assays |
| 🟡 Medium Insects (Standard Lab Use) | 3–10 mm | Mosquitoes (Aedes, Anopheles), houseflies, moth larvae (Spodoptera, Helicoverpa) | 300–500 µm (Standard Mesh) | Good airflow plus reliable containment | Ideal for olfactometer-linked experiments |
| 🟠 Large Insects | 10–25 mm | Beetles (Tribolium, Tenebrio), larger flies, grasshoppers | 500–800 µm (Coarse Mesh) | Allows better ventilation | Ensure a strong frame to resist force |
| 🔴 Very Large / Strong Insects | > 25 mm | Mantids (Tenodera), large beetles, locusts | ≥ 800 µm or perforated panels | Structural strength matters more than mesh fineness | Use reinforced aluminum or steel frames |
Experiment context: colony maintenance, dose–response bioassays, behavior/olfaction work, classroom demonstrations, semi-field holding, or field transport. Each context favors different features (e.g., clear panels for observation, heavy bases for stability, black mesh for low-glare imaging).
🧪 Experiment Context Matters in Choosing Rearing Containers & Cages
The intended use of the cage or container plays a major role in selecting the right design, material, and features. Different experimental contexts demand different priorities—ranging from visibility and airflow to durability and transport safety.
🟢 1. Colony Maintenance (Routine Rearing)
For maintaining continuous insect cultures (e.g., Aedes aegypti, Anopheles stephensi, Drosophila melanogaster, Spodoptera litura), the focus is on long-term stability and ease of handling.
Preferred features:
- Good ventilation (mesh panels)
- Sleeve openings for feeding and cleaning
- Durable frame (aluminum or plastic)
- Easy-to-clean surfaces
🔵 2. Dose–Response Bioassays (Toxicology / Insecticide Testing)
Used in studies such as WHO cone bioassays, insecticide resistance testing, and larval toxicity assays.
Preferred features:
- Standardized size and geometry
- Minimal adsorption (glass or inert plastic)
- Controlled airflow and exposure
- Replicable conditions
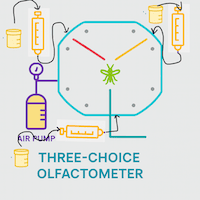
🟡 3. Behavior / Olfaction Studies
Critical for olfactometer experiments, host-seeking studies, and pheromone assays.
Preferred features:
- Black mesh or matte surfaces → reduces glare and reflection
- Uniform airflow compatibility
- Minimal odor contamination (glass preferred) — cages are usually not used for olfaction studies themselves
- Clear observation panels, strategically placed — usually on the left side of the sleeve so that the researcher can observe into the cage while releasing insects, sampling, or performing other tasks
🟣 4. Classroom Demonstrations / Teaching
Used for student learning, demonstrations, and outreach programs.
Preferred features:
- Transparent walls for visibility — clear panels may carry slight static electricity. Please discharge it before use; otherwise insects may cluster against a single surface, unable to escape its pull. If the static issue is not addressed, you may observe reduced fecundity, smaller colony size, or even early mortality. This can be resolved easily by removing the attractive charge of the clear plastic or acrylic.
- Safe, lightweight design — important when transportation is needed. Cage backbones are typically made from lightweight metal poles or fiberglass.
- Easy handling and cleaning — important for routine maintenance.
- Low cost — the cost of a cage is largely determined by the backbone material, mesh type, and functionality.
🟠 5. Semi-Field Holding / Large Experimental Setups
Used in vector ecology, release–recapture studies, and plant–insect interaction research.
Preferred features:
- Large-volume cages — for field experiments, the mesh should be UV-resistant and weather-resistant to prevent frequent replacement.
- High-airflow mesh — this is a debatable feature. A wide-hole mesh gives good airflow, but excessive air exchange dries plant materials quickly, which is a problem if live plants feed the insects. A tighter mesh (smaller hole size) restricts airflow but also prevents escape and helps retain plant moisture. The drawback is that airflow may sometimes feel insufficient inside the cage, encouraging fungal growth within the colony.
- Strong structural frames
- Weather resistance
🔴 6. Field Transport / Sample Collection
For collecting and transporting insects from field to lab, choose insect rearing containers or cages with these features.
Preferred features:
- Secure locking lids — available with insect containers
- Ventilation with filters — available with both containers and cages
- Compact and shock-resistant design — available with both containers and cages
- Leak-proof and escape-proof — available in both
🔬 Key Design Logic Across Contexts
| Feature | Why It Matters | Where It's Critical |
|---|---|---|
| Clear panels | Visual observation | Teaching, behavior studies |
| Black mesh | Reduces glare, improves imaging | Olfaction & tracking |
| Heavy/stable base | Prevents vibration | Bioassays, olfactometers |
| Fine mesh | Prevents escape of small insects | Whiteflies, thrips |
| Strong frame | Withstands large or active insects | Beetles, mantids |
| Airtight control | Prevents odor contamination | Olfactometers |
📌 Bottom Line
There is no one-size-fits-all container. The optimal design depends on whether the goal is:
- Maintaining insects so samples remain continuously available
- Measuring behavior — to understand insect responses to nearby plants or other insects
- Testing chemicals — to evaluate the effects of chemicals or other scents that might influence insect behavior
- Transporting samples — moving field-collected insects, transferring between labs, or bringing specimens from field to lab
- Teaching, demonstration, or recording data for scientific publication
Choosing the right combination of mesh, material, airflow, and visibility ensures both experimental accuracy and insect welfare.
Backbone Frames: What Holds the Cage Together
Three main variants: (a) fiberglass, (b) metal composites, and (c) aluminum profiles.
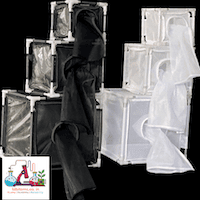
1) Nylon/Fabric Cube Cages with Fiberglass or Aluminum Backbone (4E/4F Families)
- Pros: Lightweight, affordable, fast to deploy; pack flat; excellent airflow; easy to replace panels.
- Use when: You are working on benches, in BOD incubators, or need many identical cages for replicate experiments.
- Notes: Add clear sides (MC variants) for observation or video; use double-sleeve doors when multiple users need simultaneous access.
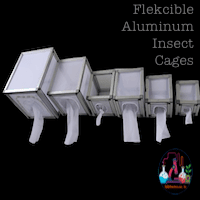
2) Aluminum Profile Cages (flek-AL Family)
- Pros: Rigid, square, and modular; accept mesh or solid/clear panels; offer better dimensional stability for frequent handling; stack and align well; long service life.
- Use when: You need ruggedness (semi-field, greenhouse, or heavy daily handling), want precise openings for ports and feeders, or need large-footprint cages.
- Notes: Heavier than fabric cubes but far more durable; panels can be swapped between nylon mesh, aluminum mesh, stainless mesh, or clear sheets.
3) Pop-up / Field Cages
- Pros: Instant deployment, ultra-portable, and very light.
- Use when: You are sampling in the field, holding insects briefly, or need rapid set-up and tear-down.
- Notes: Not as dimensionally stable; lifespan depends on handling care.
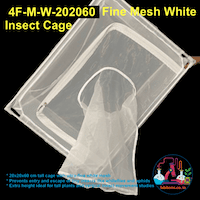
Mesh Materials and Why They Matter
Nylon Mesh (Eco/Normal vs. Fine — Based on Aperture Size)
- Eco/Normal nylon: Balanced airflow and strength; gentle on wings and setae; budget-friendly; ideal for mosquitoes, Drosophila, larger parasitoids, and many Lepidoptera and other winged insects.
- Fine nylon: Tighter apertures to contain tiny insects (thrips, aphids, whiteflies, phorids, sand flies, and similar). Airflow is lower, so plan for more mesh area or gentle fans to avoid stagnant microclimates. Light intensity inside the cage will also be reduced unless a clear panel is included on one side. This is an important consideration when placing cages in greenhouses or outdoors for field and semi-field work.
- Care: Wash with mild detergents; avoid sharp tools; prolonged UV exposure degrades nylon—indoor use lasts longer.
- When to prefer nylon: You want soft contact surfaces and a low risk of wing fray, and you will replace panels periodically. These cages are ideal when used both inside the laboratory and ported frequently to different work zones. Their light weight makes transport easy, and the ability to fold them into a compact size is a major advantage when handling large numbers of insect samples that require many cages.
Metal Mesh (Aluminum or Stainless Steel)
- Aluminum mesh: Lightweight, excellent airflow, and good indoor corrosion resistance; economical for large panels. Offers excellent return on investment for long-term use with virtually no maintenance.
- Stainless steel mesh: Highest durability; resists most disinfectants; holds its shape—especially when welded; superior "grid stability" (does not distort under pressure).
- Care: Withstands harsher cleaners and can be steam-cleaned (check gasket materials). We recommend only mild soap with our recommended cleaning cloth—wiping is usually sufficient. There is no need to soak the cages in harsh chemicals. If sterilization is required, UV exposure or rinsing with 0.1% sodium hypochlorite solution should be enough.
- When to prefer metal: Long-term, high-throughput facilities; frequent instrument contact (ports, magnets, clamps); semi-field and greenhouse use; heavier feeders and perches.
Clear Panels (Mesh + Clear = MC Variants)
- Why add clear? Superior visibility for inspection, photography, and behavioral observation; makes training and student demonstrations easier.
- Trade-offs: Less airflow than mesh; panels may fog in high humidity; clean with non-abrasive agents. You may occasionally observe insects sticking to clear panels due to static electricity. If this occurs, it is better not to use clear-panel cages. Continued use may impair the colony's breeding potential because static restricts flight; the result can be reduced fecundity and sample availability.
Selecting Mesh Fineness: Fine vs. Normal (and Airflow Balance)
Think of mesh choice as a balance between containment and ventilation:
- Fine mesh keeps the smallest species in, reduces the risk of egg or neonate escape, and prevents external contaminants from entering—but it also reduces airflow. Plan for:
- Larger mesh surface area (more mesh panels)
- Lower stocking density (fewer insects per cage)
- Active ventilation (gentle fans or distributed cages to avoid stagnant corners)
- Normal mesh provides excellent ventilation and cleaner microclimates (less condensation, more uniform temperature) and is ideal for medium-to-large insects. It is also easier to keep clean.
Practical mapping (examples):
- Fine mesh: thrips, aphids, whiteflies, leafminers, phorids, sand flies, minute parasitoids.
- Normal mesh:Aedes/Anopheles/Culex mosquitoes, Drosophila, most Lepidopteran larvae, cockroaches, larger parasitoids, and coleopterans.
If you are uncertain, start with fine mesh on at least one panel set and normal mesh on others, or choose a model family (e.g., 4F vs. 4E) that is easy to swap later.
Mesh Color & Finish: Bright Metal vs. Black-Coated
Mesh color changes how you (and your insects) experience the cage.
Bright Metal (Uncoated Aluminum / Stainless Steel)
- Pros: Maximum light transmission; crisp visibility; the reflective grid aids quick checks for frass, pupae, or mold.
- Use when: You want the clearest view, rely on ambient light, or need to see color cues accurately (e.g., mating marks, pigments).
- Notes: Can produce glare under strong lights; reflective surfaces may alter behavior in light-sensitive species.
Black-Coated Mesh
- Pros: Low glare and high contrast—insects stand out against a dark background; more comfortable for continuous visual scoring, photography, and video; reduces external light scatter.
- Use when: You film or photograph often, the room has bright task lights, or you observe subtle behaviors.
A good compromise: use bright mesh on the sides (for ambient light) and black mesh on the observation face—or the reverse, depending on your imaging and lighting setup. Alternatively, select clear-panel-sided cages.
Access, Workflow & Ergonomics
Small design choices compound into large time savings:
- Sleeve doors: A single sleeve is fine for solo work; double sleeves shine when two people service the same cage or when you pass tools or food inside without fully opening the outer sleeve.
- Zipper doors: Faster for caging and uncaging plants and large feeders; ensure zipper ends are shielded to prevent snags and micro-gaps.
- Ports & feed-throughs: Plan for sugar feeders, membrane blood feeders, CO₂ lines, and oviposition cups; sealed grommets prevent escapes.
- Panel mix: Use MC (mesh + clear) on at least one side for viewing; all-mesh for maximum airflow; clear top panels help with overhead cameras.
- Base design: Hard, waterproof bases that support heavy pots or equipment and keep floor panels taut; hard plastic bases resist spills and allow quick wipe-downs, or simply use plastic that resists water percolation.
- Sleeve diameter & placement: A 15–20 cm diameter works for most gloved hands and cups; larger openings help with plant pots. Place sleeves at a height that matches your benchtop to avoid awkward reaches. The number of sleeves also matters. For example, if a cage is 90 cm tall and has only one sleeve, you cannot comfortably work across different regions inside—maximum hand reach is 35–45 cm, so the top and bottom will be out of reach. Multiple sleeves allow access to the full cage, enable more than one person to work simultaneously, and—when placed on opposite sides—also allow insect sampling through one sleeve without increasing the escape risk at the main sleeve.
- Multiple doors: Front and side doors reduce crowding and let you stage tasks (feeders on one side, plant swaps on the other).
Size: Match Volume to Colony Density and Space
Right-sizing reduces stress (for you and the insects):
- 15×15×15 cm (151515): Quarantine individuals, pre-assay holds, classroom demonstrations, and pilot tests.
- 20×20×20 cm (202020): Compact colony maintenance, incubator shelves, and temporary field-collection holds.
- 25×25×25 cm (252525): A core research cage for many labs—good balance of volume and footprint.
- 30×30×30 cm (303030): Larger cohorts, plant material, or additional apparatus inside.
- 40×40×90 cm (404090) and up: Tall plants, vertical flight behaviors, mating arenas, or semi-field simulations; choose sturdier frames (aluminum or stainless steel).
Check shelf depth, door widths, and incubator clearances before committing. For stacked fabric cages, ensure the top remains breathable—do not block the only mesh face with another cage's base. Only a few sizes are listed here; many additional sizes can be made available based on user needs and requirements.
Environmental Control & Microclimate
Cages are micro-rooms. Plan them like one:
- Temperature & humidity: Fine mesh retains humidity; normal mesh breathes drier. Align cage choice with your room set-points.
- Light: Black mesh reduces glare; add diffusers when using bright LEDs; for photoperiod control, consider removable light-blocking covers.
- Airflow: Avoid pointing fans directly at sleeves or doors; instead, create gentle room-level circulation to prevent condensation pockets.
- Contamination: Select materials compatible with your sanitizers. Stainless steel tolerates harsher chemistries, while nylon lasts longer when used with milder agents.
Cleaning, Biosafety & Longevity
- Nylon mesh: Wash with mild detergents; avoid harsh solvents or bleach unless validated; air-dry fully; rotate panels to spread wear; keep spares—these can include poles, side panels, or the main mesh itself.
- Aluminum mesh: Mild detergents, alcohols, and most disinfectants are fine; watch for galvanic corrosion if contacts are mixed metals.
- Stainless steel: Highest tolerance to disinfectants and heat; welded grids hold their shape under repeated cleaning.
- Clear panels: Non-abrasive cleaners only; prevent micro-scratches that cloud visibility.
Build a maintenance schedule (weekly wipe-downs, monthly deeper cleans, panel inspections every quarter). Keeping seams tight and zippers clean dramatically reduces escapes.
Field vs. Lab Realities and Necessities
- Lab-first:Fabric cubes (4E normal mesh; 4F fine mesh), MC variants for viewing, and plastic bases for spill control.
- Greenhouse / semi-field:Aluminum profile or metal frames; metal mesh for durability; tie-down options; heavier bases. Stackability is practical and lets you rear multiple batches at once.
- Mobile teams:Pop-up cages for capture and transfer; medium fabric cubes for short-term holding; sleeve doors to prevent escapes during transport. Fiberglass and metal-composite pole cages also serve this purpose.
Turning Needs Into a Quick Choice (Our Series Logic)
We use consistent series codes to make selection fast:
- 4E = Eco/Normal nylon mesh (great airflow for medium-to-large insects).
- 4F = Fine nylon mesh (contains the tiniest insects; plan airflow accordingly).
- M = All (or mostly) mesh panels.
- MC = Mesh + Clear panel mix for observation.
- W / B = White (bright) vs. Black-coated mesh finish.
- flek-AL = Aluminum-profile frames with your choice of mesh (aluminum, stainless steel, nylon) and finish (bright metal vs. black-coated).
- Size strings like 151515, 202020, 252525, 303030, 404090 denote L × W × H in cm.
Example Selection Choices
- Tiny sap-feeders (thrips / aphids / whiteflies) in growth chambers: Choose 4F-M-B-252525 (fine nylon, black mesh, 25 cm cube) for high contrast and containment; add MC if you need frequent video.
- Mosquito colony maintenance on benches:4E-M-W-303030 (normal nylon, bright mesh, 30 cm cube) for ventilation and easy handling; use a double sleeve if two technicians service the cage.
- Semi-field holding with frequent handling:flek-AL-almin-Blk-M-353535 (aluminum frame, black-coated metal mesh) for ruggedness and reduced glare.
- Sterile or harsh-cleaning environment:flek-AL-SS-Bright-M-303030 (stainless steel mesh) for maximum chemical resistance and long life.
- Teaching / observation-heavy setups:4E-MC-W-252525 (mesh + clear panels, bright) for visibility—or black mesh on the front if glare is an issue.
Using Our Dropdown Selection Logic (How to Filter Fast)
- Choose your insect size class (Tiny / Medium / Large).
- Select mesh fineness:
- Tiny → Fine (4F)
- Medium/Large → Eco/Normal (4E)
- Pick visibility:
- Frequent observation or filming → MC (Mesh + Clear)
- Maximum airflow → M (All Mesh)
- Choose mesh color: black for low glare and high contrast; bright/white for maximum light and crisp detail.
- Pick the frame/backbone:
- Lab bench and budget → fabric cubes (4E/4F).
- Rugged / semi-field / long life → flek-AL aluminum profile; consider stainless steel mesh for harsh cleaning.
- Select the size (151515, 202020, 252525, 303030, 404090…) based on organism load, plant pots, and shelf/incubator space.
- Add workflow features: double sleeves, zipper doors, ports for feeders or CO₂, double-layer base, and removable trays.
- Plan spares and maintenance: extra sleeves, replacement panels or mesh sets, zipper pulls, and a cleaning kit.
Common Oversights When Selecting Insect Cages
- Undersizing the cage: Leads to humidity pockets, wall crowding, and stress behaviors. If uncertain, step up one size.
- Over-constraining with fine mesh: Great for containment but can suffocate airflow; compensate with more mesh faces or fewer insects per cage.
- Ignoring lighting and contrast: If you score behaviors daily, black mesh—or at least one black face—greatly reduces eye strain.
- Forgetting ports: Retrofitting feed-throughs later is harder than choosing a model with the right ports from the start.
- Skipping base considerations: Heavy pots on single-layer fabric floors sag and distort the mesh; choose a double-layer or hard base for weight.
Final Takeaways
- Start with species size and experimental goal, then pick mesh fineness (4F for tiny, 4E for others).
- Decide your observation style: add clear panels (MC) if you score visually or film often.
- Match the frame to the environment: fabric for bench work and budgets; aluminum or stainless steel for rugged, long-term, or semi-field use.
- Choose mesh color for your eyes and your insects: bright for light, black for contrast.
- Right-size the cage and add the workflow features (double sleeves, ports, bases) that save time daily.