


The Practical Guide to Selecting the Right Insect Rearing Cage
Choosing an insect rearing cage isn’t just a procurement decision—it shapes how confidently you handle colonies, how cleanly you run assays, and how reproducible your results are. The right cage prevents escapes, minimizes handling stress, and simplifies feeding, cleaning, and observation. This guide walks you through the major choices—frame/backbone materials, mesh types and colors, access features, and size—then shows how to translate those choices into a fast, reliable selection using our series logic (e.g., 4E, 4F, and aluminum‑profile “flek‑AL” lines). You can click here to access dropdown menu to locate insect cage of interest based on ones requirements and need.
Start with your organism and goal
Before comparing materials, anchor on two things:
Species & size: tiny sap‑feeders (thrips, aphids, whiteflies) and sand flies demand finer mesh; mosquitoes, Drosophila, and most Lepidoptera larvae do well in normal mesh; large beetles or mantids can use more open meshes and sturdier frames.
Experiment context: colony maintenance, dose–response bioassays, behavior/olfaction work, classroom demos, semi‑field holding, or field transport. Each context favors different features (e.g., clear panels for observation, heavy bases for stability, black mesh for low‑glare imaging).
A quick rule: the smaller the insect and the greater the escape risk, the finer the mesh and the tighter the tolerances (zippers, sleeve seams, panel joins).
Backbone frames: what holds the cage together --
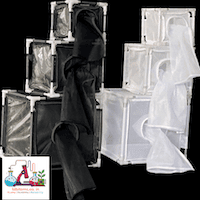
1) Nylon/fabric cube cages (4E/4F families)
Pros: Lightweight, affordable, fast to deploy; pack flat; great airflow; easy to replace panels.
Use when: You’re working on benches, in BOD/incubators, or need lots of identical cages for replicate experiments.
Pros: Lightweight, affordable, fast to deploy; pack flat; great airflow; easy to replace panels.
Use when: You’re working on benches, in BOD/incubators, or need lots of identical cages for replicate experiments.
Notes: Add clear side(s) (MC variants) for observation or videos; double‑sleeve doors when multiple users need simultaneous access.
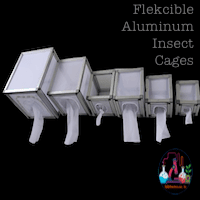
2) Aluminum profile cages (flek‑AL family)
Pros: Rigid, square, and modular; accept mesh or solid/clear panels; better dimensional stability for frequent handling; stack and align well; long life.
Use when: You need ruggedness (semi‑field, greenhouse, or heavy daily handling), want precise openings for ports and feeders, or need large footprint cages.
Notes: Heavier than fabric cubes but far more durable; panels can be swapped between nylon mesh, aluminum mesh, stainless mesh, or clear sheets.
3) Stainless steel (SS) frame cages
Pros: Maximum durability, chemical resistance, and biosecurity; tolerate aggressive cleaning; excellent for high‑compliance labs.
Use when: You expect harsh disinfectants, heat, or long‑term outdoor exposure; or must meet stringent biosafety cleaning cycles.
Notes: Heavier and more expensive; plan for wheeled bases or fixed benches for large sizes.
4) Pop‑up/field cages
Pros: Instant deployment, ultra‑portable, very light.
Use when: You’re sampling in the field, holding insects briefly, or need rapid set‑up/tear‑down.
Notes: Not as dimensionally stable; lifespan depends on handling care.
Mesh materials and why they matter
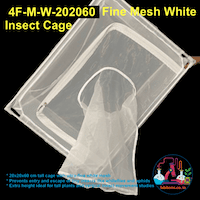
Nylon mesh (Eco/Normal vs. Fine -based on aperture sizes of the mesh grids)
Eco/Normal nylon: Balanced airflow and strength; gentle on wings and setae; easier on budgets; ideal for mosquitoes, Drosophila, larger parasitoids, many leps and winged insects.
Fine nylon: Tighter apertures to contain tiny insects (thrips, aphids, whiteflies, phorids, sand flies, or similars). Airflow is lower; plan more mesh area or fans to avoid stagnant microclimates. Also the light intensity inside the cage will be less unless clear panel is selected to be at one side of the cage. This may be important when cages are considering to chose to install inside the green houses or out doors for field or semi-field environments.
Care: Wash with mild detergents; avoid sharp tools; prolonged UV degrades nylon—indoor use lasts longer.
When to prefer nylon: You want soft contact surfaces and low risk of wing fray; you’ll replace panels periodically. Also these cages are go to go when you prefer to use cages both inside the laboratory as well as porting it frequently into different work zones. Since these cages are light in weight portability offers comfort in transportation. Since cages can be folded into a really a very small and handy size, this is an added advantage when handling huge numbers of insect samples which requires higher number of insect cages to accommodate them.
Metal mesh (Aluminum or Stainless Steel)
Aluminum mesh: Lightweight, excellent airflow, good corrosion resistance indoors; economical for large panels. Offers excellent return on investment for long term use of the cages with literally no maintenance
Stainless steel mesh: Highest durability; resists most disinfectants; holds shape, especially when welded; superior “grid stability” (doesn’t distort under pressure).
Care: Withstand harsher cleaners; can be steam‑cleaned (check gasket materials). We recommend only use mild soap to clean using our recommended cleaning cloth. Only wiping is sufficient. No need to dip the cages with harsh chemicals. If at all sterilization is needed them keeping them under UV light or washing them with 0.1% sodium hypochloride solution should be sufficent.
When to prefer metal: Long‑term, high‑throughput facilities; frequent instrument contact (ports, magnets, clamps); semi‑field and greenhouse use; heavier feeders and perches.
Clear panels (Mesh + Clear = MC variants)
Why add clear? Superior visibility for inspection, photography, and behavior observation; makes training and student demos easier.
Trade‑offs: Less airflow than mesh; may fog with humidity; clean with non‑abrasive agents. Few of the times you may observe that the insects are struct onto the clear panels due to static electricity. When you see such issues with your insect then it is better not to use clear panel cages. Using them consistently then it may effect the breeding potential of the colonies due to restrictions on the flying ability of the insects due to static electricity. Reduced fecundity and sample availability.
Selecting mesh fineness: fine vs. normal (and airflow balance)
Think of mesh choice as containment vs. ventilation:
Fine mesh keeps the smallest species in, reduces risk of egg/neonate escape, and prevents external contaminants entering—but it reduces airflow. Plan for:
Larger surface area of mesh (more mesh panels).
Lower stocking density (fewer insects per cage).
Active ventilation (gentle fans or distributed cages to avoid stagnant corners).
Normal mesh provides excellent ventilation and cleaner microclimates (less condensation, uniform temperature), and is ideal for medium‑to‑large insects. It’s also easier to keep clean.
Practical mapping (examples):
Fine mesh: thrips, aphids, whiteflies, leafminers, phorids, sand flies, minute parasitoids.
Normal mesh: Aedes/Anopheles/Culex mosquitoes, Drosophila, most Lepidoptera larvae, cockroaches, larger parasitoids, coleopterans.
If you’re uncertain, start with fine mesh on at least one panel set and normal on others, or choose a model family (e.g., 4F vs. 4E) that’s easy to swap later.
Mesh color & finish: bright metal vs. black‑coated
Mesh color changes how you (and your insects) experience the cage.
Bright metal (uncoated aluminum/SS):
Pros: Maximum light transmission; crisp visibility; reflective grid aids quick checks for frass, pupae, or mold.
Use when: You want the clearest view, rely on ambient light, or need to see color cues accurately (e.g., mating marks, pigments).
Notes: Can produce glare under strong lights; reflective surfaces may alter behavior for light‑sensitive species.
Black‑coated mesh:
Pros: Low glare, high contrast—insects stand out against a dark background; more comfortable for continuous visual scoring, photography, and video; can reduce external light scatter.
Use when: You film/photograph often; the room has bright task lights; you observe subtle behaviors.
Notes: Coatings vary—choose quality coatings that resist flaking and tolerate cleaning agents used in your lab.
A good compromise: bright mesh on sides (ambient light), black mesh on observation face, or vice versa, depending on your imaging/lighting setup.
Access, workflow & ergonomics
Small design choices compound into big time savings:
Sleeve doors: Single sleeve is fine for solo work; double sleeves shine when two people service the same cage or when you pass tools/food inside without opening the outer sleeve fully.
Zipper doors: Faster for caging/uncaging plants and large feeders; ensure zipper ends are shielded to prevent snags and micro‑gaps.
Ports & feed-throughs: Plan for sugar feeders, membrane blood feeders, CO₂ lines, or oviposition cups; sealed grommets prevent escapes.
Panel mix: MC (mesh + clear) on at least one side for viewing; all‑mesh for maximum airflow; clear top panels help with overhead cameras.
Base design: Double‑layer bases support heavy pots or equipment and keep floor panels taut; hard plastic basesresist spills and make wipe‑downs quick.
Sleeve diameter & placement: 15–20 cm works for most gloved hands and cups; larger openings help with plant pots; place sleeves at a height that matches your benchtops to avoid awkward reaches.
Multiple doors: Front + side doors reduce crowding and let you stage tasks (feeders one side, plant swaps the other).
Size: match volume to colony density and space
Right‑sizing reduces stress (for you and the insects):
15×15×15 cm (151515): Quarantine individuals, pre‑assay holds, classroom demos, pilot tests.
20×20×20 cm (202020): Compact colony maintenance; incubator shelves; field collection temporary holds.
25×25×25 cm (252525): Core research cage for many labs—good balance of volume and footprint.
30×30×30 cm (303030): Larger cohorts, plant material, or additional apparatus inside.
40×40×90 cm (404090) and up: Tall plants, vertical flight behaviors, mating arenas, or semi‑field simulations; choose sturdier frames (aluminum/SS).
Check shelf depth, door widths, and incubator clearances before committing. For stacked fabric cages, ensure the top remains breathable—don’t block the only mesh face with another cage’s base.
Environmental control & microclimate
Cages are micro‑rooms. Plan them like one:
Temperature & humidity: Fine mesh retains humidity; normal mesh breathes drier. Align cage choice with room set‑points.
Light: Black mesh reduces glare; add diffusers if using bright LEDs; for photoperiod control, consider removable light‑blocking covers.
Airflow: Avoid pointing fans directly at sleeves/doors; instead, create gentle room‑level circulation to prevent condensation pockets.
Contamination: Select materials compatible with your sanitizers. SS tolerates harsher chemistries; nylon extends life with milder agents.
Cleaning, biosafety & longevity
Nylon mesh: Wash with mild detergents; avoid harsh solvents/bleach unless validated; air‑dry fully; rotate panels to spread wear; keep spares.
Aluminum mesh: Mild detergents, alcohols, and many disinfectants are fine; check for galvanic corrosion if contacts are mixed metals.
Stainless steel: Highest tolerance to disinfectants and heat; welded grids keep shape under repeated cleaning.
Clear panels: Non‑abrasive cleaners only; prevent micro‑scratches that cloud visibility.
Build a maintenance schedule (weekly wipe‑downs, monthly deeper clean, panel inspection every quarter). Keeping seams tight and zippers clean dramatically reduces escapes.
Field vs. lab realities
Lab‑first: Fabric cubes (4E normal mesh; 4F fine mesh), MC variants for viewing, clear bases for spill control.
Greenhouse/semi‑field: Aluminum profile or SS frames; metal mesh for durability; tie‑down options; heavier bases.
Mobile teams: Pop‑up cages for capture and transfer; medium fabric cubes for short‑term holding; sleeve doors to prevent escapes during transport.
Turning needs into a quick choice (our series logic)
We use consistent series codes to make selection fast:
4E = Eco/Normal nylon mesh (great airflow for medium‑to‑large insects).
4F = Fine nylon mesh (contain tiniest insects; plan airflow accordingly).
M = All/mostly Mesh panels.
MC = Mesh + Clear panel mix for observation.
W / B = White (bright) vs. Black‑coated mesh feel.
flek‑AL = Aluminum profile frames with your choice of mesh (Al, SS, nylon) and finish (Bright metal vs. Black‑coated).
Size strings like 151515, 202020, 252525, 303030, 404090 denote L×W×H (cm).
Example “recipes”
Tiny sap‑feeders (thrips/aphids/whiteflies) in growth chambers:
Choose 4F‑M‑B‑252525 (fine nylon, black mesh, 25 cm cube) for high contrast and containment; add MC if you need frequent video.Mosquito colony maintenance on benches:
4E‑M‑W‑303030 (normal nylon, bright mesh, 30 cm cube) for ventilation and easy handling; double sleeve if two techs service.Semi‑field holding with frequent handling:
flek‑AL‑almin‑Blk‑M‑353535 (aluminum frame, black‑coated metal mesh) for ruggedness and reduced glare.Sterile/harsh cleaning environment:
flek‑AL‑SS‑Bright‑M‑303030 (SS mesh) for maximum chemical resistance and long life.Teaching/observation‑heavy setups:
4E‑MC‑W‑252525 (mesh + clear panels, bright) for visibility; or black mesh front if glare is an issue.
Using our dropdown selection logic (how to filter fast)
Choose your insect size class (Tiny / Medium / Large).
Select mesh fineness
Tiny → Fine (4F)
Medium/Large → Eco/Normal (4E)
Pick visibility
Need frequent observation/filming → MC (Mesh + Clear)
Maximum airflow → M (All Mesh)
Choose mesh color
Black for low glare/high contrast; Bright/White for maximum light and crisp detail.
Pick the frame/backbone
Lab/bench & budget → Fabric cubes (4E/4F).
Rugged/semi‑field/long life → flek‑AL aluminum profile; consider SS mesh for harsh cleaning.
Select the size (151515, 202020, 252525, 303030, 404090…) based on organism load, plant pots, and shelf/incubator space.
Add workflow features
Double sleeves, zipper doors, ports for feeders/CO₂, double‑layer base, removable trays.
Plan spares & maintenance
Extra sleeves, replacement panels/mesh sets, zipper pulls, and a cleaning kit.
Follow this in order and you’ll typically identify a short list of 2–3 models that fit 95% of needs.
Common oversights while selecting the insect cages
Undersizing the cage: Leads to high humidity pockets, wall crowding, and stress behaviors. Step up one size if uncertain.
Over‑constraining with fine mesh: Great for containment but can suffocate airflow; compensate with more mesh faces or fewer insects per cage.
Ignoring lighting and contrast: If you score behaviors daily, black mesh or at least one black face greatly reduces eye strain.
Forgetting ports: Retrofitting feed‑throughs later is harder than choosing a model with the right ports from the start.
Skipping base considerations: Heavy pots on single‑layer fabric floors sag and distort mesh; choose double‑layeror hard bases for weight.
Final takeaways
Start with species size and experimental goal, then pick mesh fineness (4F for tiny, 4E for others).
Decide your observation style: add clear panels (MC) if you score visually or film often.
Match frame to environment: fabric for bench work and budgets; aluminum or SS for rugged, long‑term, or semi‑field use.
Choose mesh color for your eyes and your insects: bright for light, black for contrast.
Right‑size the cage and add the workflow features (double sleeves, ports, bases) that save time daily.